Introduction
This guide explains how one can efficiently alternate between a serger and a sewing machine within a limited studio footprint. Readers will learn how to arrange equipment, configure each device, and maintain a smooth workflow that minimizes downtime. The instructions focus on the Brother 1034D Serger and the Brother CS7000X, two tools that complement each other for professional‑grade finishing and decorative stitching. By following the steps, one can achieve consistent results without sacrificing valuable studio space.
What You'll Need
- Brother 1034D Serger (price $319.99, rating 4.6/5)
- Brother CS7000X Sewing and Quilting Machine (price $249.99, rating 4.6/5)
- Serger thread pack (included in the Brother 1034D Serger Bundle)
- Universal sewing machine needles (included in the bundle)
- Cutting mat, rotary cutter, and fabric scissors
- Thread storage containers and bobbin winder
- Small rolling cart or sturdy table with a power strip
Step‑by‑Step Instructions
1. Prepare the Workspace
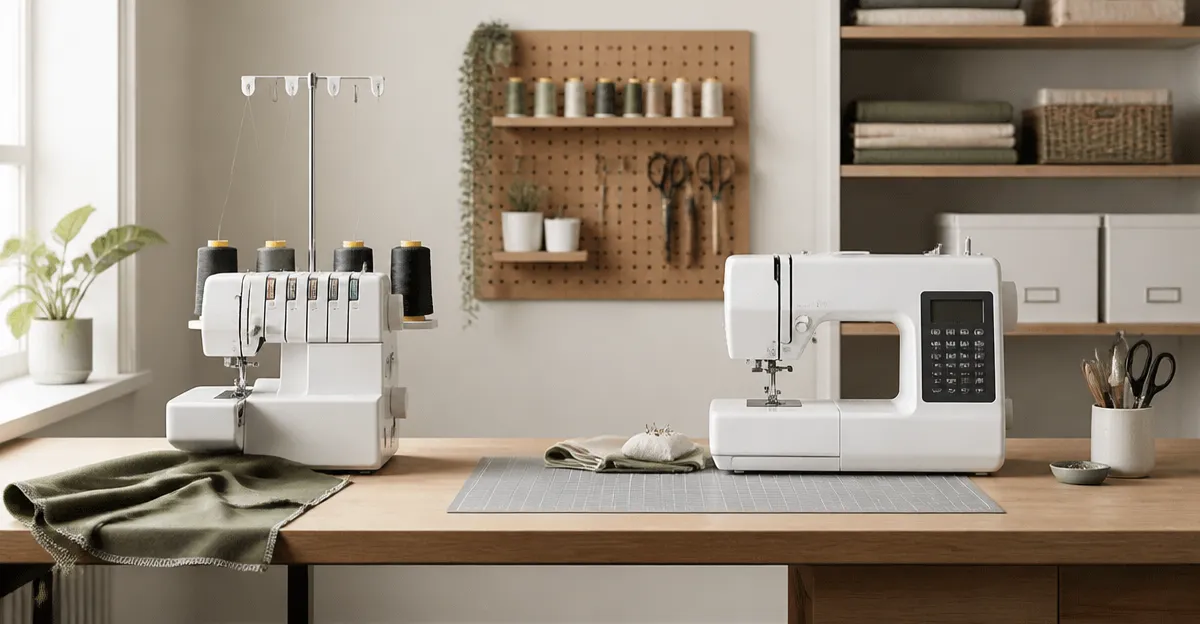
Begin by clearing a work surface that measures at least 48 inches in width to accommodate both machines side by side. Place a rolling cart or sturdy table near a wall outlet and install a power strip with surge protection to supply both devices simultaneously. Position the serger on the left side, where its free arm can be accessed without obstructing the sewing machine on the right. This arrangement mirrors the workflow recommended by experienced sewists who alternate between overlock and lockstitch operations.
The metal frames of both the Brother 1034D Serger and the Brother CS7000X provide stability, reducing vibration on a compact table. Ensure the table is level; an uneven surface can cause thread tension problems, especially when the serger operates at 1,300 stitches per minute.
2. Unbox and Install the Serger
Unpack the serger and verify that the metal frame and all accessories are present. Attach the included snap‑on presser foot that matches the intended stitch type; the standard foot is ideal for basic overlock seams, while the gathering foot assists with decorative edges. The serger features a 3/4 lay‑in thread system with a lower looper threader, which simplifies the threading process for users of all skill levels.
Thread the machine using the color‑coded upper thread guides and the F.A.S.T. lower looper threading system. Load one of the four pre‑threaded spools from the bundle (white, pearl grey, hi‑taupe, or black) to evaluate tension settings quickly. Set the stitch selector to a 4‑thread overlock for durable seams on denim or multiple‑layer garments. Adjust the differential feed dial to compensate for stretch fabrics, a function praised in user reviews for delivering a perfect finish.
3. Set Up the Sewing Machine
Place the Brother CS7000X on the right side of the table and attach the appropriate presser foot for the first project, such as the quilting foot for large‑area work. The machine includes a large needle‑to‑arm workspace, which is essential when handling bulky quilts or layered fabrics.
Activate the improved automatic needle threader to reduce hand fatigue, especially for users with arthritis, as mentioned in customer sentiment. Load a bobbin using the jam‑resistant drop‑in top bobbin system, then select a stitch from the 70 built‑in options via the LCD display. For basic seam construction, choose a utility stitch; for decorative edging, explore the heirloom stitches.
4. Organize Thread and Needle Supplies
Keep the serger thread pack and the universal needle assortment from the bundle within arm’s reach. Store each thread color in a labeled container to avoid confusion when switching between machines. The serger’s ability to handle 3‑ or 4‑thread constructions requires matching thread weights; medium weight polyester is a safe default for most projects.
When transitioning to the sewing machine, replace the serger thread with cotton or cotton‑polyester blends suitable for lockstitch seams. Insert a new needle appropriate for the fabric weight; the bundle includes sizes ranging from 70/10 (fine) to 90/14 (heavy). This organization prevents the common problem of needle breakage during high‑speed serging, a concern expressed by reviewers who experienced difficulty with bent fingers.
5. Switch Between Machines Efficiently
To move from serging to sewing, first turn off the serger using the foot pedal control and release the presser foot. Slide the serger’s free arm away from the work area, then bring the sewing machine’s arm forward to the fabric. Because both machines share the same power strip, there is no need to re‑plug; simply toggle the power switch on the unit you intend to use.
Maintain consistent fabric tension by keeping the workpiece taut on the serger’s differential feed before transferring it to the sewing machine’s feed dogs. Use a pair of fabric clips to hold the edge in place during the hand‑off. This technique reduces stretching and ensures that the seam line remains straight when the lockstitch is applied.
6. Perform a Test Stitch on Each Device
Before commencing the main project, sew a short test swatch on both the serger and the sewing machine. On the serger, verify that the overlock edge is clean and that the looper threads interlock without gaps. On the sewing machine, confirm that the selected stitch length and width produce even stitching, and that the needle descends to the correct position as indicated on the LCD.
Adjust thread tension or stitch settings as needed based on the test results. The serger’s 1,300 stitches per minute speed can be moderated with the foot pedal, allowing one to match the sewing machine’s slower pace for seamless transitions.
7. Clean and Maintain Both Machines
After each session, remove lint and dust from the serger’s looper area using a small brush. Oil the moving parts according to the manufacturer’s manual to preserve the high‑performance metal frame. For the sewing machine, wipe the metal frame with a soft cloth and change the bobbin if thread residue is visible.
Regular maintenance extends the lifespan of both devices, a point highlighted by reviewers who praised the durability of the metal construction. Store the machines covered when not in use to protect them from dust and accidental spills.
Tips & Pro Tips
- Use the snap‑on presser foot system on the serger to switch stitch types in seconds, minimizing downtime.
- Leverage the LCD display on the CS7000X to save favorite stitch combinations for quick recall.
- When working with stretchy knit fabrics, increase the differential feed on the serger and reduce stitch length on the sewing machine to prevent puckering.
- Keep a spare set of needles and bobbins on the rolling cart; this prevents frantic searches during a tight deadline.
- Utilize the free arm on the serger for cylindrical items such as sleeves; then finish the seam with a lockstitch on the CS7000X for added strength.
Troubleshooting
Thread tension too tight on the serger: Reduce the upper thread tension by one click and verify that the lower looper tension is set to the middle position.
Skipped stitches on the sewing machine: Check that the needle is inserted correctly and that the bobbin is wound evenly. Replace the needle if it shows signs of wear.
Fabric bunching on the serger: Adjust the differential feed dial toward the higher number to feed more fabric and reduce gathering.
Conclusion
By arranging the workspace, threading each machine correctly, and following a disciplined switching routine, one can achieve professional results in a compact studio. The combination of the high‑speed, heavy‑duty Brother 1034D Serger and the versatile, user‑friendly Brother CS7000X provides a complete solution for overlocking, decorative stitching, and quilting. Implementing the tips and maintenance practices outlined above will ensure consistent performance and extend the lifespan of both machines.
Frequently Asked Questions
How can I arrange a serger and sewing machine in a small studio to save space?
Place the machines side‑by‑side on a sturdy table and use a shared power strip, then keep a rolling cart or wall‑mounted rack for accessories to keep the floor clear.
What is the best way to quickly switch between the Brother 1034D serger and the Brother CS7000X sewing machine?
Turn off both machines, release the presser foot, and slide the serger’s needle plate off while moving the sewing machine’s presser foot up, then re‑thread the appropriate thread set.
Do I need separate needles for the serger and the sewing machine?
Yes; use the universal sewing machine needles for the CS7000X and the specific serger needles (often included in the 1034D bundle) for the serger to ensure proper stitch formation.
Can I use the same thread pack for both the serger and the sewing machine?
No; serger thread is typically a 3‑strand polyester blend, while the CS7000X uses standard single‑strand cotton or polyester thread, so keep them separate.
What maintenance steps help minimize downtime when alternating between the two machines?
Regularly oil the serger’s bobbin area, change needles on both machines after 8‑10 hours of use, and keep the work area clean to prevent lint buildup that can cause thread jams.